How to Make a Origami Ninja Star Out of Rhombuses
You are here: Home / Learn / Math Activities / Math Art Awesomeness: Make a Transforming Ninja Star
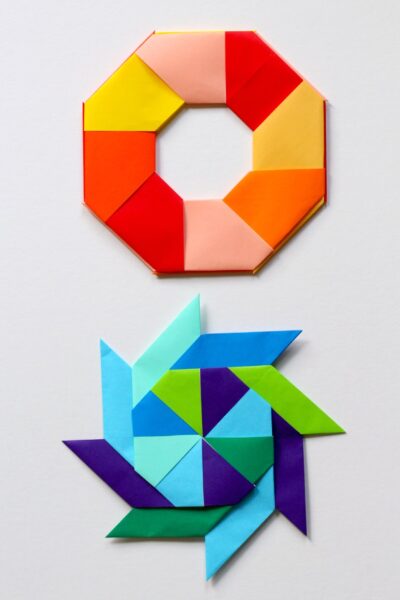
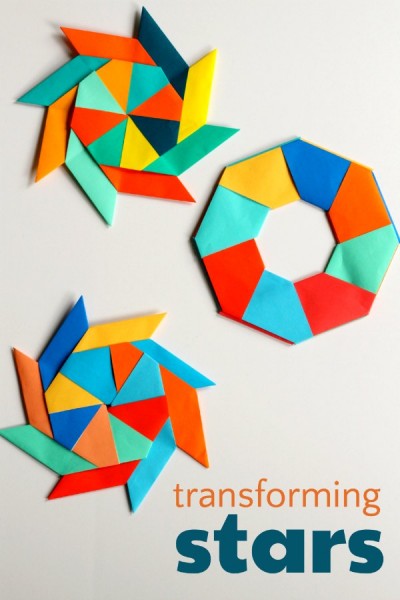
We are in love with these origami transforming paper stars. This gem of a project combines math, art and paper engineering.
I'll be totally honest, it's not the easiest project for very little ones, but if your child can fold a paper airplane (which is the perfect STEM play date, by the way!) then he or she can make the transforming ninja star. It's a good math art project when you have some one on one time with your older child. Alternatively, you can make them yourself and if your younger children are old enough that they won't rip the completed project, you can show them how to play with it. (Note: this post contains affiliate links.)
Bonus: the completed project looks so complicated that you can fool people into thinking you are an origami ninja. And isn't that what we all want in life?
How to make transforming paper stars
What you need:
- Origami paper
- Curious kids
Instructions:
You can also see the technique in action in the video below.
First make 8 parallelograms:
1. Fold paper in half. Open and repeat fold so white side of paper is showing.
2. With paper oriented vertically, and open side on the right, bring bottom left corner to right hand edge. Crease well. (Note: I like to also crease this same fold on the alternate side. It is not strictly necessary but it makes the final fold easier.)

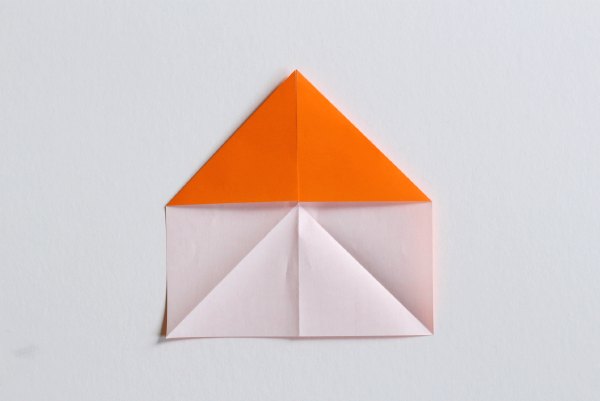
3. Open paper with colored side facing down.
4. Fold top two corners to middle crease. Crease well.
5. Fold paper in half (repeating step 1).
6. Push the center of the bottom edge up. The creases you made in step 2 will collapse between the sides.
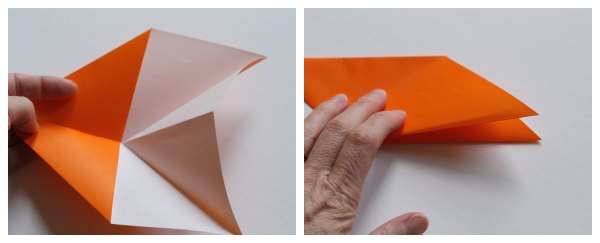
7. The resulting shape will be a parallelogram.
8. Make 8 of these.
How to make the star:
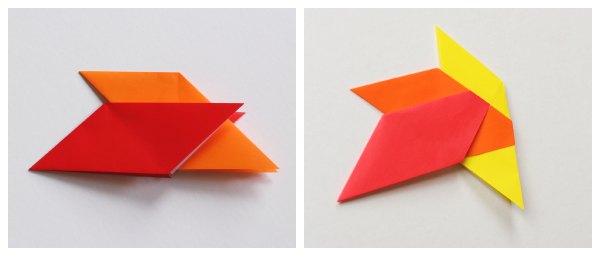
1. You will now connect all 8 parallelograms.
2. Orient two parallelograms so the the "pocket" in which you see the interior color is on the right.
3. Insert one parallelogram into the pocket of the first.
4. Fold down the tips of the first parallelogram inside the pocket of the second.
5. Insert a third parallelogram into the pocket of the second.
6. Fold down the tips of the second parallelogram into the third.
7. Repeat until you have 2 left.
8. The last part is the trickiest. Slip the pocket of the seventh parallelogram around the point of the first. Then put the pocket of the eighth around the point of the seventh. The point of the eighth parallelogram will be in the pocket of the sixth. Fold all the tips down.
How to transform the star:
Push and pull the sides and watch it transform from an octagon to a star!
Please experience its awesomeness by watching this video:
Now I know what you are thinking. There is no way I came up with this idea myself. Of course not! That is what the library is for.
MORE: Do you love math art as much as we do? See all our math art projects and read our favorite math art books.
Want more 52 more STEAM activities? Get the free list, plus step by step instructions for 2 sample projects. Sign up here.

Reader Interactions
Trackbacks
How to Make a Origami Ninja Star Out of Rhombuses
Source: https://www.whatdowedoallday.com/transforming-ninja-star/
0 Response to "How to Make a Origami Ninja Star Out of Rhombuses"
Post a Comment